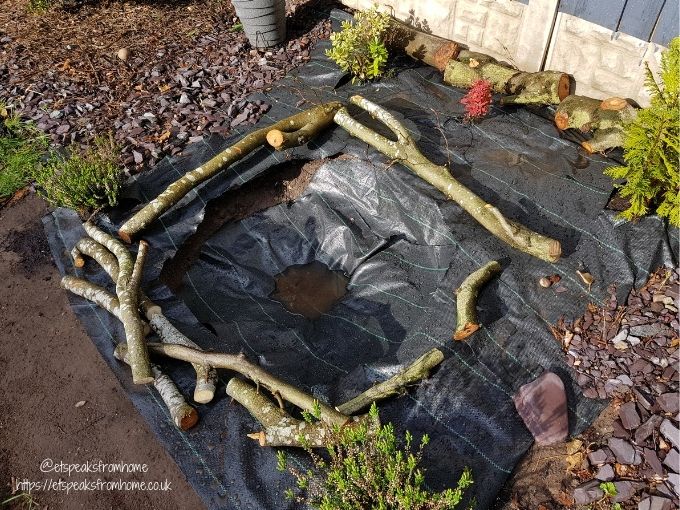
After staring at the old and tired decking for two years, we finally dug it out and replaced it with a nature wildlife pond in our back garden! It was hard work but definitely worth doing it as it doesn’t just look great, it is also good for the wildlife.

We moved to our home two years ago and I always hated the small square decking sitting in the far-middle of the garden. It was already old when moved in and some parts of the decking had rotted and grew weeds. Finally, after my daughter wanted a pond, I decided we could make it together with her! In fact, ponds (and building ponds) are great for kids, and they can learn a lot about nature and wildlife through them – it’s best to make sure they’ve got some kids waterproofs to wear, though, as it can get pretty wet and muddy!
Before I jumped right in, I did some research via the Wildlife Trusts website and watched plenty of YouTube videos. The plan was for a small pond as the decking area was 2 x 2 metres. It was not a big space and I didn’t want it to eat into too much of the garden area. Besides that, I also had a problem with clay. Our garden is mainly made up of clay and it can be quite hard to dig.
In total, I spent three afternoons creating this pond. I spent the first afternoon just dismantling the decking. I had to use a hammer to break up the decking and saw into smaller pieces to fit in the back of my car to take to the tip. It was quite hard work as were also roots under the decking.


The next day, I spent nearly six hours just digging and added plants around the area. First, I marked out the pond on the ground and then dug with my daughter. I also placed the groundsheet to collect any stones or items for the brown/black bin. While digging, I used the soil to refill the surrounding area. The old decking area seems to have subsided and it was uneven.


Then I used bricks to create a border around it as you can see in the photos. The bricks also give me a bit of height for my pond so don’t need to dig too deeply. I tried to ensure the sides are level to include some shallow areas in the pond but it was quite difficult. I do think this step is crucial! My water plants are not sitting properly because the ground is not level! But don’t worry, I have tips to make the plants stay in place.

While digging, we removed sharp stones from the bottom of the hole and saved some stones for decoration. There are a lot of websites that suggested using building sand to fill the area so the stones will not pierce into the pond liner later in the stage, but we didn’t have this. Building sand is cheap to buy and you can get it from any DIY shop for less than £4 a bag. The website also suggested trying old carpet, newspapers or even loft insulation material. I have plenty of plastic covers that I laid on the ground. I also planted small plants around the areas. Normally, they don’t suggest having plants around the pond as the roots might pierce into the pond liner in future. I just happened to have quite a few dying plants laying around. I do hope they survive! I also laid the plastic sheets around the plants and placed stones on them.


The next day, I placed the pond liner (bought from Amazon, the liner is thin but very cheap – okay value, I had space that I could use two layers) carefully in the hole and tucked the edge into the plastic sheets before weighing it down with big rocks. If possible, use collected rainwater to fill your pond. As it hadn’t rained for ages, I resorted to filling the pond with tap water. As this is a small pond, it only took 10 minutes to fill! Once I was happy with the pond, I then snipped the excess liner off with scissors. Then tucked the liner neatly around the pond area.

I placed some turf to fill in the gap and the stones that I saved from the dig around the edge of the pond. We also have plenty of logs that I used to decorate the areas with.

My friend gifted me her water iris and I also bought a few to fill the pond. When I first placed the water plant into the pond, it just tipped and floated into the pond! My friend then told me to fill the pots with stones and wrap with clothing to stop them from floating away.
I decided to use my old stocking to wrap the pot and filled it with soil and stones! It does the trick and now it just stays in place. As the stockings are brown, you won’t even notice the pots are wrapped!
I also bought a AISITIN Solar water fountain 5.5w at a discount price of £23.99. It has six different spouts. I ended up using the spout with one big opening as it makes the loudest watery noise and requires less cleaning. Smaller spouts can trap dirt more easily and can stop working after some time. So far, I haven’t needed to clean the spout or filter at all.

Now I can’t wait to look out for new visitors to our pond!
Disclosure: We have included an Amazon affiliate link to the product. If you click on this and buy, we may earn a small commission. This is a featured post.